How one ClojureScripter writes JavaScript
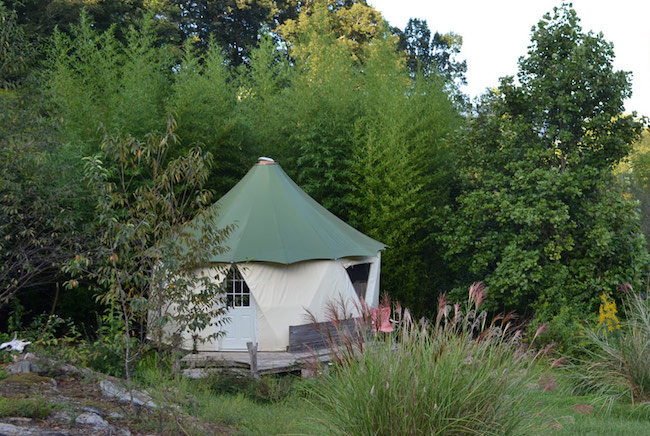
My friend Peter, the inventor of the Yome (pictured above) and proprietor of Red Sky Shelters asked me to update an interactive widget that I built for him 9 years ago.
I usually code in ClojureScript, so I thought it would be interesting to demonstrate how I would go about writing this widget in JavaScript. ClojureScript and React together have given me a preference for extremely straightforward, live reloadable, functional code, while abstaining from absolutely everything that isn’t needed.
ClojureScript has inspired me to write JavaScript in a way that reflects the simplicity of the Yome itself.
You can interact with the completed JavaScript widget right here:
This widget represents a blueprint that helps the potential Yome buyer show Peter where they want their windows and doors placed.
It’s all about cognitive overhead
Straightforward: not complicated and easy to understand
As developers we do something that is very difficult. In response to this difficulty we create and reach for tools that promise to take some of this burden from our shoulders. Often we are faced with the hard reality that these tools may not, in fact, be helping us. These tools often offer the promise of lightening our cognitive overhead but in the end, the set of complex problems has just been moved from one location to another. Even worse, the set of problems has been exacerbated with much increased complexity.
As of late, I have been hearing what seem like justified reactions to this complexity. Folks are saying things like: jQuery considered harmful, “Frameworks are dead”, Monolith first etc. There seems to be a reductionism at hand and it’s understandable. For a really great talk about this see Programming with Hand Tools.
The main point here is we actually want to reduce cognitive overhead, and not just push it around, or worse, grow it with bad trade-offs.
There really is no free lunch, so instead of looking to techniques, patterns, libraries, and frameworks, maybe we should look at simplifying the computation itself.
The trouble with Objects
In our code, complexity normally takes the form of Object instances that maintain a mutable local state. I conjecture that Ruby, Java and the general prevalence of OOP has led many developers to code in an object first manner. When faced with a blank file and a problem, the modern developer seems to gravitate towards creating Objects.
It’s this predilection that I take issue with. Folks are unconsciously and prematurely spending the complexity budget of their applications. Eventually there will be a real need, performance or otherwise, to create an Object. I’m suggesting that one wait until that need arises and code in an object last manner.
Why is functional programming straightforward?
My answer to this is that the complexity and cognitive overhead of your program grows exponentially as you add more local mutable state and side effects. When you reason about your program you have to account for the potential state of all these changeable/changing entities and entity systems. It is amazing how quickly things grow past our ability to effectively reason about them. This, my friend, is cognitive overhead.
But in order to write a program we have to compute, right? Where does that leave us?
If we are ruthlessly reductive and eschew all mutable local state and side effects, it leaves us with the pure function:
view = F(state)
This is the very base of computation, and it’s very hard to simplify past this point. (Declarative programming does this, but …)
Using functions we can add code to our programs without significantly increasing the complexity. Programming with pure functions is more like taking a relaxing stroll because you can often limit the scope of your thinking to the input and output of the current function.
Of course, pure functions can only take us so far in an interactive program. State and views are required to change over time in response to user actions. But I am going to ruthlessly stick to pure functions as far as I can, and when I have to compromise and write a function with side effects, I will. In doing so, I will minimize complexity as much as possible and then hopefully the only complexity I have left will represent the essential complexity of the program.
Straightforwardness != Familiarity
It’s important to note that straightforwardness has nothing to do with familiarity. Just because a technique, language or syntax is familiar or even an accepted industry best practice does not mean that it is straightforward. And likewise, just because someone doesn’t understand the code or finds it strange, that does not mean that it isn’t straightforward.
YAGNI - You really aren’t going to need it
I’m not only going to be reductive with my computation but my tooling as well.
As I go through the widget implementation below please notice all the things that aren’t there:
- no jQuery
- no drawing library
- no explicit observable model objects
- no double bindings
- no top level React component
- no custom React elements
- no modules
- no Webpack, Browserfy, less or sass, etc.
In fact, I’m just using ONE library: React. I’m also using one tool: Babel to compile the JSX and the ES2015 fat arrow syntax.
Why use React?
If I’m being so reductive why even use React, which introduces its own cognitive overhead? I see this not only as a necessary trade-off, but the very thing that enables us to express views and DOM state functionally.
The DOM API doesn’t let us express view = F(state) in an efficient
manner. React makes this possible.
For example, with React/JSX I can write view code like this:
function todoItem(todo) {
  return <div className={ todo.completed ?
                          "completed" :
                          "not-completed" }>
    {todo.content}
  </div>;
}

function todos(todos) {
  const notCompleted = todos.filter(t => !t.completed);
  return <div className="todo-list">
    <h1>Todo List ({ notCompleted.length })</h1>
    { notCompleted.map(todoItem);}
  </div>;
}
These are pure functions that take data and return a Virtual DOM which then can be diffed with the actual DOM and rendered very efficiently. In fact, React is an extremely exciting development and one of the reasons that I’m writing this post in the first place.
The setup
To really appreciate this way of coding, it’s important to experience the process as well as the code. For this reason, I am going to guide the reader through the construction of the widget, in a way that simulates how I built it. If you follow along you will get to experience the “live” interactive aspect of the development process as well as appreciate how directly the code applies to the problem.
To start, we need to get Babel to watch and compile the JavaScript/JSX.
npm install --global babel
Create the project files and directories:
mkdir -p yome_widget/src
mkdir -p yome_widget/build
touch yome_widget/src/yome.js
touch yome_widget/index.html
touch yome_widget/style.css
Grab this content for the style.css file.
Grab this content for the index.html file.
We will need the Babel compiler to watch our yome.js file and
compile it whenever we hit save. We can do this by invoking babel
like so:
cd yome_widget
babel src/ -w --out-dir build/
Now, open your browser to file:///<the path on your
system>/yome_widget/index.html and open yome_widget/src/yome.js in
your favorite text editor.
From now on, you can add code to the file by appending the examples
in this post to the yome.js file.
If you would rather follow along with the completed project you can get it from the github repositiory.
The future is live
As a ClojureScripter, I have become very accustomed to live code reloading. When I wrote this code, I made a simple file reloader so that I could see my code changes in real time without reloading the page for every change.
One of the benefits of using pure function definitions and constraining side effects is that it makes it very easy to write code that can just be reloaded “whole hog”.
Go ahead and put this at the top of the yome.js file.
var Reloader = Reloader || {};

Reloader.reloadFile = (path) => {
  var x = document.createElement("script");
  x.setAttribute("src",path + "?rel=" + (new Date().getTime()));
  document.body.appendChild(x);
  setTimeout(function(){ document.body.removeChild(x);}, 1000);
}

Reloader.startReloading = (files) => {
  setTimeout(function() {
    console.log("--- reloading ---");
    files.map(Reloader.reloadFile);
  }, 500);
}

Reloader.startReloading(["build/yome.js"])
Now, reload the index.html page and open the Developers Console
of your browser. You should see --- reloading --- get printed out
every 3 seconds.
The interesting thing here, is that this Reloader code is being reloaded itself, so you can change it and see the behavior change without reloading the browser.
Go ahead and modify the Reloader.startReloading function and change
the timeout from 500 to 3000. Or change the "--- reloading ---"
string to "--- reloading files ---". You will see a likewise change of
behavior in the console. You can adjust the timing as you prefer.
This can be a little hard to get used to, but remember that as you make your changes below, you don’t have to reload the browser.
If this isn’t for you or if you need to turn it off, just
remove the code above or comment out the startReloading line like
so:
//Reloader.startReloading(["build/yome.js"])Welcome to instantaneous live reloading, it is the future.
The Start
Now append these definitions to the yome.js file:
function l(x) { console.log(x);  return x; }

var Yome = Yome || {};

Yome.initialState = () => {
  return { sides: [1,2,3,4,5,6,7,8].map( () => new Object() ) }
}

Yome.state = Yome.state || Yome.initialState();
//l(Yome.state)
In the code above, you can see that I define a Yome object literal and
on that literal I add an initialState function.
In this yome widget there will be one state map/object. This will be the central source of truth. The visualization of the state widget will be a function of this data.
Yomes come in three sizes: 6, 7 or 8 sides. Thus, the view from above
is either a hexagon, septagon or octagon. As you can see from the
initialState function above, we are going to be starting with an
octagon.
Yome.sideCount = (st) => st.sides.length
//l(Yome.sideCount(Yome.state))
The widget allows for drawing different Yome sizes so we will need to
assess the current size often. Yome.sideCount will allow us to do
this. Notice that Yome.sideCount is pure function and is not
referencing some local/global state, but rather the state is passed
into it.
Now you can check the functioning of sideCount by uncommenting the log
line below it, then observing the output of the function call in the
Dev Console. This output should be 8. After verifying that it works,
comment out that log line again.
Yome.sliceTheta = (st) => 2 * Math.PI / Yome.sideCount(st)
//l(Yome.sliceTheta(Yome.state))
Since we are working with regular
polygons, I am going to
constantly be referencing the angle of one of the polygon slices (an
octagon has eight slices). The sliceTheta function gives us this
angle in radians.
Again, you can see it working by uncommenting the log line below it and seeing the output in the Dev Console.
I will continue to place these log comments in the code and I will leave it up to you to try them out by uncommenting and recommenting them.
Yome.rotate = (theta, point) => {
  const sint = Math.sin(theta), cost = Math.cos(theta);
  return { x: (point.x * cost) - (point.y * sint),
           y: (point.x * sint) + (point.y * cost) };
}
//l(Yome.rotate(Math.PI, {x: 0, y: 1}));

Yome.radialPoint = (radius, theta) =>
  Yome.rotate(theta, {x: 0, y: radius})
//l(Yome.radialPoint(100, Math.PI));
Now, I am planning on having a 500x500 SVG based widget and I’m going to be drawing things arranged in a circle. It will be much simpler to think in terms of radial points. In this case, a radial point is the combination of a distance from a center and an angle from a line pointing straight down.
In order to facilitate radial points it’s necessary to Yome.rotate a
point about the center at 0,0.
The radialPoint function just takes a point that lays straight down
a distance radius from the center and then rotates it to an angle
theta from there.
Yome.sidePoints = (st) =>
  st.sides.map((_,i) => Yome.radialPoint(180, i * Yome.sliceTheta(st)))
//l(Yome.sidePoints(Yome.initialState()))
With this new found ability to create points about a center at any given angle it becomes trivial to generate a set of points that delineate the sides of the yome.
Yome.pointsToPointsString = (points) =>
  points.map(p => p.x + "," + p.y).join(" ")
//l(Yome.pointsToPointsString(Yome.sidePoints(Yome.initialState())))
Here we take a set of points and turn it into a string for the SVG polygon element.
If you have been using the log utility l to see the output of these
functions, then you may be starting to appreciate how easy it is to
verify that these functions are working.
This easy verifiability is also a result of using pure functions. It is often very simple to meet the data shape needs of a pure function by conjuring up some quick data to pass into it.
Yome.drawWalls = (state) =>
  <polygon points={Yome.pointsToPointsString(Yome.sidePoints(state))}>
  </polygon>
Here we start generating some SVG with JSX. The Yome.drawWalls method
will take the current state and emit an React polygon element.
Now when we get here, we would really like to know if our code for drawing octagons is working. While our log function is helpful for seeing how data-based functions are behaving, it is useless for checking how our visual functions are working.
Verifying graphical functions
You may have noticed a playarea element in the index.html. We are
going to create a log function that renders functions like
Yome.drawWalls into the playarea element of our application page.
Yome.svgWorld = (children) =>
  <svg height="500" width="500" viewBox="-250 -250 500 500"
       preserveAspectRatio="xMidYMid meet">
    {children}
  </svg>

Yome.playArea = (children) =>
  React.render(Yome.svgWorld(children), document.getElementById("playarea"))

Yome.clearPlayArea = () =>
  React.unmountComponentAtNode(document.getElementById("playarea"))
Above, I have created a utility function playArea that allows us
to see the visual output of function that returns React SVG elements.
You can paste in the following commented out drawWalls expressions to
help verify how our drawWalls function is working.
//Yome.playArea(Yome.drawWalls({sides: [1,2,3,4,5,6]}))
//Yome.playArea(Yome.drawWalls({sides: [1,2,3,4,5,6,7]}))
//Yome.playArea(Yome.drawWalls({sides: [1,2,3,4,5,6,7,8]}))

//Yome.clearPlayArea()
If you uncomment the first line you should see the following in your browser:
You can also uncomment the other examples and see that we are indeed successfully drawing the regular polygons that we are looking for.
Now, leave one of the logging functions uncommented, so that it renders each time you save the file.
You can now modify the Yome.sidePoints function to change the radius
of the points in the polygon. Modify the radius which is
currently 180 in the Yome.sidePoints function. Go ahead and try
values of 50, 120 and then back to 180.
As you can see, we now have a way to quickly examine the output of our DOM emitting functions live. This is very helpful.
Comment out the playArea logging functions above before you go on.
Windows and Doors
Let’s draw some windows and doors.
I’m planning on abusing the ability of SVG to rotate things. So, I am going to just worry about drawing an item in one position and then letting SVG rotate it to the appropriate side of the Yome.
For all of the different things that are being drawn I just need to find the set of radial points that will outline the needed item.
Let’s start with windows.
Yome.windowPoints = (st) => {
  const theta = Yome.sliceTheta(st),
        indent = theta / 6;
  return [Yome.radialPoint(160, indent),
          Yome.radialPoint(160, theta - indent),
          Yome.radialPoint(100, theta / 2)];
}
//l(Yome.windowPoints(Yome.initialState()))

Yome.drawWindow = (st) =>
  <polygon points={ Yome.pointsToPointsString(Yome.windowPoints(st)) }>
  </polygon>

//Yome.playArea(<g>{Yome.drawWindow(Yome.initialState())}
//                 {Yome.drawWalls(Yome.initialState())}</g>)
First we create a function windowPoints that creates the points for
our window. Using radial points, thinking about this is pretty
straightforward. We tighten the radius in from the walls a little. We
then create points that are close but indented from the corners of the
side polygon and then we connect these to a point that has an even
shorter radius and is centered on the side of the Yome.
If you uncomment the second playArea call you will see this:
Great, we have a window!! Now you can, of course, play with the
dimensions of this window by adjusting the windowPoints function.
I’m going to follow this same process for the rest of the drawn items, starting with doors.
Yome.doorPoints = (st) => {
  const indent = Yome.sliceTheta(st) / 8;
  return [Yome.radialPoint(165, indent ),
          Yome.radialPoint(165, -indent),
          Yome.radialPoint(90,  -indent),
          Yome.radialPoint(90, indent)];
}

Yome.drawDoor = (st) =>
  <polygon points={ Yome.pointsToPointsString(Yome.doorPoints(st)) }>
  </polygon>

//Yome.playArea(<g>{Yome.drawDoor(Yome.state)}
//                 {Yome.drawWindow(Yome.state)}
//                 {Yome.drawWalls(Yome.state)}</g>)
The big difference with the door and the rest of the items is that they are drawn at the corner, whereas the window is drawn at a face.
If you render a door and a window you will see this:
The zip door is a little challenging because it isn’t just a group of points that we turn into a polygon. A zip door is a set of lines.
Yome.drawLine = (line) =>
  <line x1={line.start.x} y1={line.start.y}
        x2={line.end.x} y2={line.end.y}>
  </line>

Yome.drawZipDoor = (st) => {
  const theta   = Yome.sliceTheta(st),
        indent  = 0.15 * (theta / 6),
        lines   = [0,1,2,3,4,5,6,7,8].map((x) => {
          const dist = 170 - (10 * x);
          return {start: Yome.radialPoint(dist, -indent),
                  end:   Yome.radialPoint(dist, indent)}});
  lines.push({start: Yome.radialPoint(180, 0),
              end: Yome.radialPoint(90, 0)});
  return <g>{lines.map(Yome.drawLine)}</g>;
}

//Yome.playArea(<g>{Yome.drawZipDoor(Yome.state)}
//                 {Yome.drawWalls(Yome.state)}</g>)
Here is a zip door:
Then there is the stove vent which is an ellipse.
Yome.drawStoveVent = (st) => {
  const theta = Yome.sliceTheta(st),
        point = Yome.radialPoint(155, 0);
  return <ellipse cx={point.x} cy={point.y} rx="14" ry="8"
                  key="stove-vent"></ellipse>
}

//Yome.playArea(<g>{Yome.drawStoveVent(Yome.state)}
//                 {Yome.drawWalls(Yome.state)}</g>)
And here is a stove vent:
Well this is great. We have quickly built up our drawing primitives and they are all functional.
We may want to reflect at this point: Why is it so effortless to display and work with our different drawing functions?
Dispatch
You may have noticed a familiar pattern in the drawing functions
above. Those of you who had an OOP education may see the old
shape polymorphism exercise: the classic example where you have a
Drawable class or interface that defines a draw method. Then you
can pass a list of drawable things to a renderer and the renderer will
just draw them. Easy peasy.
But here is the deal: Why the heck would I want to do this? Yes I do want dispatch, but creating a bunch of objects that have different draw methods is a lot of ceremony when I just want to dispatch on some type of data. If I want dispatch, why not just create it directly?
Here is my dispatch:
Yome.itemRenderDispatch = {
  "window":     Yome.drawWindow,
  "door-frame": Yome.drawDoor,
  "zip-door":   Yome.drawZipDoor,
  "stove-vent": Yome.drawStoveVent,
}

Yome.itemRender = (type, st) =>
  (Yome.itemRenderDispatch[type] || (x => null))(st)
Now I have a way of rendering an item based on its type items. Simple! This is also extensible:
Yome.itemRenderDispatch["__default"] = (_) => nullNow in order to use this render function we are going to need some data. Let’s create a more interesting Yome by adding some features to the sides.
Yome.exampleData = ((state)=>{
  state.sides[0].face = "window"
  state.sides[0].corner = "zip-door"
  state.sides[3].face = "window"
  state.sides[5].corner = "door-frame"
  state.sides[5].face = "window"
  state.sides[7].corner = "stove-vent"
  return state
})(Yome.initialState())

//l(JSON.stringify(Yome.exampleData))
If you print out the resulting exampleData you will see that each
side has an optional face and corner. face can have a value of
“window” and corner can be “door-frame”, “zip-door” or “stove-vent”.
Let’s put our method dispatch to work to draw a complete yome along with its features.
First, we need a way to draw a single slice (side) which is a grouping of a corner and a side.
Yome.sliceDeg = (st) => 360 / Yome.sideCount(st)

Yome.sideSlice = (st, i) => {
  const side = st.sides[i];
  if(side.corner || side.face)
    return  <g transform={ "rotate(" +  (Yome.sliceDeg(st) * i) + ",0,0)" }>
      {Yome.itemRender(side.corner, st)}
      {Yome.itemRender(side.face,   st)}
    </g>
}

//Yome.playArea(Yome.sideSlice(Yome.exampleData, 5))
//Yome.playArea(Yome.sideSlice(Yome.exampleData, 0))
The sideSlice function returns a rendering of a face and a corner of
one of the sides of the Yome layout. It also uses SVG functionality to
rotate it into its appropriate position in the drawing.
If you uncomment the first log statement you will see the 6th side of the eight sided Yome, which has a door and a window, rendered in its correct position like this:
So this is cool, we have a working dispatch itemRender function and
we are successfully able to render a side of the example Yome. There
is very little we have left to do to render the whole Yome
layout.
Yome.drawYome = (st) =>
  <g transform={ "rotate(" + (Yome.sliceDeg(st) / 2) + ",0,0)" }>
    { Yome.drawWalls(st) }
    { st.sides.map((side, i) => Yome.sideSlice(st,i)) }
  </g>

//Yome.playArea(Yome.drawYome(Yome.exampleData))
//Yome.clearPlayArea()
In the drawYome function above, we just draw the walls of the Yome
and then draw all the features. You’ll notice that I also rotate the
drawing half a slice. This is because I like having the flat sides in
alignment with the rectilinear universe of the webpage.
And voila!
Now that we can render our Yome, let’s add some functions to
render our widget to the app element in our index.html
// --- Add new code above this line ---

Yome.widget = (st) =>
  <div className="yome-widget">
    <div className="yome-widget-body">
     { Yome.svgWorld(Yome.drawYome(st)) }
    </div>
  </div>

Yome.render = () =>
  React.render(Yome.widget(Yome.state), document.getElementById('app'))

Yome.render();
At this point, we have created all the code needed to draw our Yome widget.
Straightforward? Am I right?
Do we need anything more than the above to express how to draw our Yome layout clearly?
This is straightforward, right? The code above is both understandable and reduces cognitive overhead.
Not only that, we can also reload it live and verify the output of the individual functions with great ease.
Since it’s possible to express things this way, this begs an important question: Why would we create complexity when it isn’t needed?
Embracing Change
Let’s add a way to control the number of sides in our Yome layout.
We are now in a place where we are going to have to change the state of the program. An input event is going to get fired from the user and we are going to have to:
- change the program state
- rerender the Yome
These side effects are absolutely unavoidable in an interactive system. Because there is no way to get by without them, I’m going to call them the essential complexity of the program.
There are innumerable ways to express how the state is changed and the widget is re-rendered. But since these side-effects are unavoidable I’m going to let the needs of the actual program dictate how this should be done. Again, I’m keeping to my reductive stance of not adding anything that isn’t needed.
//side effecting
Yome.eventHandler = (f) =>
  (e => {e.preventDefault(); f(e.target.value); Yome.render()})
Let’s look at this event handler function. All the events in our system
are going to be composed of this eventHandler. This function takes a
side-effecting function f that will be changing the state of the
application in response to an event. This eventHandler function
builds and returns an event handler that will call this side-effecting
function f and then re-render the widget after the state transition.
Yep, it is that simple. I have handled the requirements for both state transition and re-rendering.
Normally, we would have some sort of state object that fires an event
when it changes. We would then hook the re-render of the widget to that
change event. But this really is not needed for this small application.
Instead, I am just sneaking a call to Yome.render() into the
eventHandler so that it occurs after a state change.
Keep in mind that this is the first part of this program that I will change as our event listeners start having more sophisticated needs (like asynchronous Ajax calls). Again, the added complexity is just not needed here.
Let’s look at how this eventHandler is used:
//side effecting
Yome.changeSideCount = (new_count) => {
    let nArray = Array.apply(null, Array(parseInt(new_count)));
    Yome.state.sides = nArray.map((_,i) => Yome.state.sides[i] || {});
}
//Yome.changeSideCount(6)
//Yome.changeSideCount(7)
//Yome.changeSideCount(8)
The changeSideCount method does just what its name states. It
changes the number of sides on the Yome. It does this by directly
changing the global state. This is the essential complexity of
the program and we are going to have to do it one way or another, so
why not the easiest most straightforward way?
So far, we have minimized the side effects of this entire program to
the eventHandler and the changeSideCount functions.
Let’s use these functions to change the Yome layout directly from our widget.
Yome.sideOptions = () =>
  ["HexaYome", "SeptaYome","OctaYome"].map(
    (l, v) => <option value={v + 6}>{l}</option>)

Yome.sideCountInput = st =>
  <div className="top-control">
    <span> Size of Yome </span>
    <select onChange={ Yome.eventHandler(Yome.changeSideCount) }
            value={ Yome.sideCount(st) }>
      { Yome.sideOptions() }
    </select>
  </div>
//React.render(Yome.sideCountInput(Yome.state),
//             document.getElementById("playarea"))
Here is a select input that allows you to change the Yome size. If there is a change it fires our event handler which in turn will change the state of the application and re-render it.
It’s interesting to note, the sideCountInput function is still a pure
function that returns some virtual DOM. This virtual DOM in turn
references another function changeSideCount that will change the
state. The function itself is still a pure function.
If you uncomment the React.render call, you can see our new size
control and if you select the different sizes you should see the Yome
layout change.
Let’s integrate this sideCountInput into the widget proper. Go edit
the Yome.widget function so that it now looks like this:
Yome.widget = (st) =>
  <div className="yome-widget">
    { Yome.sideCountInput(st) }
    <div className="yome-widget-body">
     { Yome.svgWorld(Yome.drawYome(st)) }
    </div>
  </div>
Now our size control is part of the widget:
The window controls
Now it’s time to build the controls that let us add and remove windows from the Yome layout.
Yome.worldPosition = (point) => ({ x: point.x + 250, y: point.y + 250})

Yome.addRemoveWindow = (i) =>
  (_) => {
    const side = Yome.state.sides[i];
    side.face = (!side.face ? "window" : null);
  }

Yome.windowControl = (st, side, i) => {
  let theta = Yome.sliceTheta(st) * (i + 1),
      pos   = Yome.worldPosition(Yome.radialPoint(200, theta)),
      add   = !side.face;
  return <div className="control-holder" style={ { top:  pos.y,
                                                   left: pos.x } }>
    <a className={ "window-control-offset " +
                   (add ? "add" : "remove")}
       onClick={ Yome.eventHandler(Yome.addRemoveWindow(i)) }
       href="#">
       { add ? "+ window" : "- window" }
    </a>
  </div>
}

Yome.windowControls = (st) =>
  st.sides.map((side, i) => Yome.windowControl(st, side, i))
This code follows the pattern that we just established with the size
control. We create a bunch of absolutely positioned window control
links around the perimeter of the Yome layout. When someone clicks on
a link we change the state by taking the chosen side and adding the
string "window" to the face property or nulling it out.
We’ll add the window controls to our widget function:
Yome.widget = (st) =>
  <div className="yome-widget">
    { Yome.sideCountInput(st) }
    <div className="yome-widget-body">
     { Yome.windowControls(st) }
     { Yome.svgWorld(Yome.drawYome(st)) }
    </div>
  </div>
Now the widget should render like this:
And the Yome widget comes to life!
You can refer to the JavaScript code for this widget to see how I implemented the rest of the corner controls or you can implement them yourself as an exercise. I recommend the latter, of course.
Straightforward code as an enabler
The full Yome widget is not a trivial application, but by using a straightforward approach I was able to create something that works for my friend in a relatively short period of time and managed to have fun while doing it.
This is important. The straightforwardness of the code enabled me to just continue to do the next task at hand and in the end provide actual value to my friend.
Another way to say this: by addressing the complexity directly at the level of computation I was able to write this program correctly with less overall effort.
Problems that aren’t
The programming pattern used in this widget does have some potential problems that will show themselves as an application built like this grows. These are not problems for the program as presented but it’s important to mention some of the looming gotchas.
Asynchronous Event Handlers
It’s very likely that we are going to need asynchronous code in our event handlers at some point.
The current eventHandler can’t handle asynchronous callbacks and
if asynchronous code is used, it’s possible that Yome.render will be
called before the state has actually changed. As soon as this type of
behavior is needed it’s better to move to a pattern where the render
happens explicitly as a result of a state change.
Modularity
This code currently doesn’t lend itself to being used more than once in a client environment.
This again isn’t a problem for the current use case, but can be easily remedied by enclosing it in its own React component and storing the state in the local state of the component. This doesn’t require much refactoring at all. This also solves the previous asynchronous handler problem, because the component automatically re-renders when the local state of a React element changes.
You could also componentize the program without using a React wrapper and there are many well known patterns to do this.
Here is a quick re-factor to make this widget modular.
Unsafe data structures
The biggest problem that I have with the above code is that someone may accidentally modify the state during the render phase.
The Yome.state is mutable and any function that has a reference to
it during the render phase may accidentally change the state while it
is, say, conjuring up some derivative state for some other function.
This is easier to do than one may think.
This could definitely cause some hard to find bugs and wreak havoc on the apparent independence of the functions that we are creating. It is for this reason that I would very likely start using immutable (persistent) data types like the ones found in Immutable-js. Immutable data is the most efficient way to prevent functions from inadvertently side effecting and accidentally ruining the data for the application. Immutable data guarantees that our pure functions are indeed independent.
Refactoring the Yome widget to use immutable data would be easy. But again, for this widget, it really isn’t needed yet. The data transitions are few and it’s easy to keep track of the few code sections that do mutate data.
Adding Immutable.js to the Yome widget addresses all the problems outlined above and would be a fantastic exercise. Have a look at the Immutable.js cursor and see if that is helpful in making the code more modular.
If folks are interested, I will do a follow-up post that addresses these things.
Performance
If we could get away with doing pure functional computation all the time, life would be awesome. However, we will eventually run into computational limits.
When using pure functions to create a complete Virtual DOM representation of an application view, it is possible that the size of our Virtual DOM tree will get too bulky for the React differencing algorithm to complete quickly. It is at this point that I will start breaking the application down into some well-placed React components to trim the Virtual DOM tree a bit.
It is important to remember that the in-memory differencing of the Virtual DOM is very VERY fast and you can probably render 20x the amount of Virtual DOM than you think you can. It’s hard to comprehend the performance of modern JavaScript engines.
However, there is a limit, and when you reach it there will probably be an obvious bottleneck, some large section of the DOM that doesn’t change that often.
You can take care of these bottlenecks fairly simply if you are using
Immutable.js to hold your application data. The following
memoizeReact function can make extremely short work of trimming the
Virtual DOM tree.
Yome.pureRender = Yome.pureRender || React.createClass({
  shouldComponentUpdate: function(nextProps, _) {
    return !(this.props.data.length === nextProps.data.length &&
             this.props.data.map((p,i) =>
               p === nextProps.data[i]).reduce((a,v) => a && v, true));
  },
  render: function() {
    return this.props.f.apply(null, this.props.data);
  }
});

Yome.memoizeReact = (f) =>
  function () {
    let args = Array.prototype.slice.call(arguments);
    return React.createElement(Yome.pureRender, { data: args, f: f});
  }
You can use memoizeReact to create memoized React
functions like this:
Yome.drawWindowMem = Yome.memoizeReact(Yome.drawWindow);Now the drawWindow function will only be executed when the
arguments to drawWindowMem have changed value.
This simple memoize pattern can extend this purely functional approach quite far.
Thanks!
Thanks for reading this and I hope you found something useful here.
If you find this way of coding attractive, you may want to check ClojureScript out. Who knows? It may affect your JavaScript as well.
Special thanks to William Blasko(@wukkuan), Egg Syntax(@eggsyntax), Sean Omlor(@seanomlor), James Long(@jlongster) and Dominique Ferraton for reviewing this post.
Links
- Code of JavaScript Yome Widget
- ClojureScript
- Programming with Hand Tools
- Why Why Functional Programming Matters Matters
- Out of the Tar Pit
- Local state is Poison
- SICP
Comments
I have created a gist for comments: